Hey everyone! If you’ve ever dabbled in printing, sign-making, or even just preserving a favorite photo, you’ve probably heard of digital thermal lamination film. As someone who’s been supplying this stuff for years—seeing folks mess up the install (and stress over it) way too often—I figured I’d put together a no-BS, step-by-step guide to getting it right on the first try. No fancy jargon, just real tips that’ll save you time, material, and probably a few gray hairs. Digital Thermal Laminaton Film
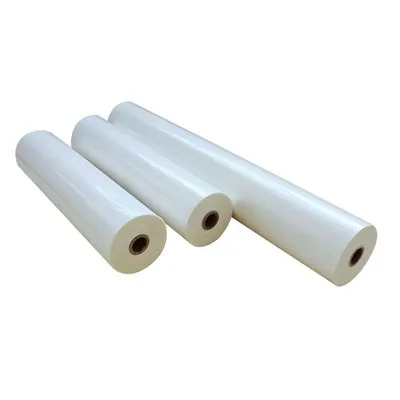
First, let’s get one thing straight: digital thermal lamination film isn’t the old-school stuff you used at office supply stores for reports. This is thin, precise, and made specifically for digital prints—think those posters, stickers, or even custom die-cut pieces you crank out on your wide-format printer. It’s designed to bond with ink when heated, creating a tough, scratch-resistant layer that also makes colors pop. Sound good? Great, but installing it wrong can turn a $50 print job into a $50 paperweight. I’ve seen it happen, so trust me when I say prep is everything.
Let’s start with the basics you’ll actually need. No, you don’t need a fancy industrial machine unless you’re doing big runs, but you do need the right gear. First, the star of the show: the digital thermal lamination film itself. Pro tip from the supply side: make sure you’re grabbing film that’s matched to your print type. If you’re doing inkjet prints, get inkjet-specific thermal film; if it’s laser, grab laser-grade. Using the wrong one? It won’t bond—period. Then, you’ll need a thermal laminator. It doesn’t have to be top-of-the-line, just a model that gets to the correct temp (most thermal films work between 200-300°F, but always check the film’s spec sheet—seriously, don’t skip that). Next, you’ll need a squeegee or a flat, hard card (like an old gift card or credit card—no creases, though!) to smooth out bubbles, and a lint roller. Lint is the enemy here—even a tiny piece of dust under the film will show up like a pimple on a poster. Oh, and a cutting tool—utility knife or scissors, just make sure it’s sharp. Dull scissors will tear the film, and we don’t want that.
Now, let’s talk prep. This is the step most people rush, and it’s where 90% of bad installs go wrong. First, pick a clean, flat space. Your garage floor is not it (unless you vacuumed it twice and wiped it down with a microfiber cloth). A dining table or a clean workbench is perfect, just cover it with a sheet of acid-free paper if you can—no plastic, because static electricity loves plastic, and static will attract all the lint in the room. Turn off any fans or AC vents too—air movement = dust floating around. Next, prep your print. Make sure it’s completely dry. Digital ink takes a few minutes to set, but laser toner needs to cool down fully—wait at least 10 minutes after printing, I promise. If you laminate a warm print, the moisture or heat will get trapped, and you’ll end up with bubbly, peeling film. Then, roll out your print on the prepped table, ink-side up. Now, lint roll the entire thing twice. Don’t skip this—even if you think it’s clean, there’s probably a tiny piece of paper fiber or makeup particle you can’t see. Lint roll your hands too, because we’re going to be touching the adhesive side of the film, and oil from your hands will mess with the bond.
Okay, now we get to the actual install. Let’s break this down into manageable steps. First, load the film into your laminator. Wait—how do you know which side is adhesive? Digital thermal lamination film is usually clear, and the adhesive side is the one that’s slightly tacky when you touch it (gently—don’t press hard!). If it’s not obvious, grab a piece of scrap film and test it with your finger. The tacky side is the one that will stick to the print when heated. Now, load the film into the laminator with the adhesive side facing the print. Most laminators have a top and bottom roller—you want the adhesive side to come into contact with the print, not the other side. If you load it backwards, it will stick to the roller instead of your print, and you’ll have a big mess.
Next, align the film with your print. This is where patience pays off. Line up the edge of the film with the edge of the print, leaving about a 1/8 inch border on all sides. Too much border is fine, too little and you’ll have ink peeking out later. Once it’s aligned, use your squeegee (or gift card) to gently smooth the top of the film. Start from the center and work your way outwards, like you’re spreading butter on toast. This pushes out any air bubbles before they get rolled into the laminator. If you see a tiny bubble, don’t panic—just lift that section of the film (carefully, so you don’t tear it) and re-smooth it. Bubbles that are small enough will pop when you run them through the laminator, but big ones? They’ll stay forever.
Now, it’s time to run it through the laminator. Double-check the temperature—set it 10°F higher than the manufacturer’s recommendation, just to be safe (but don’t go over, that will melt the film). Feed the print and film into the laminator slowly, making sure it’s straight. If it starts to skew, stop and adjust—don’t force it, that’s how you get a crooked lamination. Once it’s all the way through, let it cool for 2-3 minutes. Don’t touch it right away, because the adhesive is still soft and will smudge if you mess with it.
Wait, you’re not done yet! The excess film around the edges—you need to trim that. Wait until it’s completely cool (I know, I said 2-3 minutes, but give it 5 just to be sure). Use a sharp utility knife or scissors to trim the border, following the edge of the print. If you want a clean, professional look, use a ruler to guide the knife—no wobbly lines. If you do end up with a small bubble after trimming, you can sometimes fix it by poking a tiny hole in the bubble with a pin, then pressing the film flat with your squeegee. Don’t poke too hard, though—you’ll tear the print.
Now, let’s talk about common mistakes I see all the time, because even if you follow the steps, these can ruin your day. First, using the wrong film. I can’t stress this enough—your digital print uses a specific type of ink, and the film has to match. If you buy cheap film off Amazon that says “universal thermal lamination,” it won’t bond properly. It’ll peel in a few months, and you’ll be back asking why. Second, not waiting for the print to cool. I’ve had customers bring me prints that were printed 2 minutes prior, wanting to laminate them right away. The moisture from the ink and the heat from the printer get trapped between the film and the print, leading to water spots that you can’t get rid of. Third, rushing the prep. I once had a customer who skipped the lint roll, and the finished poster had a tiny speck of dust right in the center of their logo. They had to reprint the whole thing—cost them $100. That’s a $5 lint roller saving you a ton of money. Fourth, feeding the laminator too fast or too slow. Too fast and the film doesn’t get enough heat to bond; too slow and the heat warps the print. Most laminators have a speed setting—use the lowest speed for thin digital thermal film.
If you’re working with thicker films (like 3mil or 5mil), the steps are almost the same, but you might need to adjust the temperature and speed. Thicker film needs more heat to activate the adhesive, so bump the temp up 10-15°F, and slow the speed down just a little. Also, when loading thicker film, make sure the rollers are adjusted correctly—check your laminator’s manual, because some have a dial for roller pressure. Too much pressure and you’ll crush thin prints; too little and the film won’t bond.
Wait, what about when things go wrong? It happens. If you get a wrinkle, don’t panic—if it’s still warm, you can often peel the film back gently, smooth it out, and re-run it through the laminator. If it’s cooled, maybe you can trim around the wrinkle, but if it’s in a noticeable spot, that reprint is looking more likely. The key is to catch mistakes early—don’t wait until you’ve trimmed the edges to check. After it comes out of the laminator, hold it up to a light and look for bubbles, wrinkles, or uneven bonding. If you spot them while it’s still warm, you can fix it.
Now, a quick note from a supplier’s perspective: always buy your digital thermal lamination film from a reputable source. I’ve had customers come to me with film they bought from a random site, and it’s either the wrong thickness, the adhesive is bad, or it’s prone to scratching. Cheap film might seem like a good deal, but it’s not worth it. Our film is designed specifically for digital prints, with consistent adhesive strength so you don’t have to worry about peeling or bubbling. Plus, we provide free spec sheets and troubleshooting tips if you ever run into issues—no hoops to jump through, just real help.
So, to wrap this up: prep your space, prep your print, align carefully, take your time, and don’t skip any steps. Installing digital thermal lamination film isn’t rocket science, but it does need attention to detail. If you follow these steps, your finished prints will look great, last for years, and keep their color even when exposed to sunlight or spills.
If you’re ready to grab the right film for your project, or have questions about which thickness works best for your prints, don’t hesitate to reach out. We stock a full range of digital thermal lamination films for inkjet, laser, wide-format, and everything in between, and we’re here to help you get the job done right. Whether you’re a small business owner doing custom signage or a hobbyist preserving art, we’ve got you covered.
PET Thermal Lamination Film References
- Technical Guidelines for Digital Thermal Lamination, International Association of Printing House Craftsmen, 2022
- Lamination Best Practices for Digital Prints, Printwear & Promotion Association, 2021
- Troubleshooting Common Lamination Issues, Specialty Graphic Imaging Association, 2023
Yantai Hongqing Packing Material Co., Ltd.
Yantai Hongqing Packing Material Co., Ltd. is one of the most professional digital thermal laminaton film manufacturers and suppliers in China, also supports customized service. Welcome to wholesale advanced digital thermal laminaton film made in China here and get quotation from our factory. Quality products and reasonable price are available.
Address: Eastern Industrial Park, Taocun, Yantai, Shandong Province, China
E-mail: cindy@ythongguang.cn
WebSite: https://www.hqingnewmat.com/
