If you’re a facility manager, an industrial technician, or someone who relies on temperature gauges for critical operations—whether that’s monitoring food storage, manufacturing processes, HVAC systems, or agricultural storage—you know a faulty gauge isn’t just an inconvenience. It can lead to spoiled products, regulatory fines, costly equipment downtime, or even safety hazards. As someone who’s worked in the temperature gauge supply industry for over a decade, I’ve seen firsthand how many users treat these tools like “set-it-and-forget-it” devices, only to realize too late that a small amount of regular maintenance could have saved them thousands. Today, I’m breaking down exactly how to maintain your temperature gauge, based on both hands-on field experience and the industrial standards we train our customers on. Temperature Gauge

First, let’s get one thing straight: maintenance for temperature gauges isn’t a one-size-fits-all task. The care you give a bimetal gauge for a cold storage freezer is different from what you do for a pressure-temperature gauge on a steam boiler, and a digital gauge for a pharmaceutical fridge needs even more specific checks. But regardless of the type, there are core principles that apply to every gauge we supply. Let’s start with the most basic, often overlooked step: regular visual inspections. You’d be surprised how many issues start with something as simple as a cracked housing or a loose connection.
I recommend doing a visual check once a month, and more often if your gauge is in a harsh environment. What does that inspection include? First, step back and look at the entire unit. Is the outer housing intact? If it’s metal, are there dents or rust spots? Rust might seem cosmetic, but it can eat through the housing over time, especially in high-moisture areas like food processing plants or outdoor HVAC units. For plastic housings, look for cracks or brittleness—this is common in gauges exposed to extreme temperatures, like those placed near furnace exhaust or in uninsulated attics. A cracked housing lets dust, moisture, and even insects get inside, which can gum up the internal mechanisms of analog gauges or cause circuit issues in digital ones.
Next, check the face of the gauge itself. Is the glass or plastic lens clear, or is it foggy, scratched, or smudged? Smudges might seem like a minor problem, but they can make it hard to read accurate temperature readings, especially if your gauge is in a bright area where glare is an issue. Fog inside the lens is a bigger red flag—it means moisture has already gotten inside, and that’s a sign the seal around the gauge is failing. If you see fog, that’s an urgent fix, not a cosmetic one. Also, make sure the pointer is aligned correctly when the gauge is at a known reference temperature (we’ll talk about calibration later), and that there are no loose parts rattling inside the case (if you hear that, it’s definitely time for a closer look).
Now, if your gauge is an analog bimetal or liquid-in-glass model, you’ll want to add a gentle cleaning step to that monthly inspection. For the face and lens, use a soft, lint-free microfiber cloth and a mild, non-abrasive cleaner—nothing too strong, like window cleaner with ammonia, because that can damage the face’s printed markings over time. Avoid using paper towels or rough cloths, which can scratch the lens. For the outside of the metal housing, you can wipe it down with a damp cloth and a little dish soap, then dry it thoroughly to prevent rust or water spots. Never take apart an analog gauge for cleaning on your own unless you’re trained to do so—misaligning the internal components is a common mistake that leads to inaccurate readings.
Digital temperature gauges, which are increasingly popular for their precision and data logging, have slightly different maintenance needs, but the core visual check still applies. For digital units, pay extra attention to the battery compartment. A loose or corroded battery is one of the most common causes of digital gauge failure, and it’s completely preventable. Once every three months, open the battery compartment (make sure the gauge is powered off first) and check for corrosion on the battery terminals. If you see white or green buildup, gently clean it with a cotton swab dipped in rubbing alcohol, and replace the battery with a high-quality alkaline or lithium battery—never use rechargeable batteries for critical applications, as they can fail unexpectedly. Also, check the display for dead pixels or dimness; a dim display is a sign the battery is dying, and dead pixels can make readings unreadable in low light.
Once you’ve done the visual and cleaning checks, the next most critical maintenance task is calibration. This is the part that trips up most users, and it’s also the part that separates a functional gauge from one that’s reliable for operations. A gauge that’s out of calibration doesn’t just give bad readings—it can lead to compliance issues. For example, in the food industry, the FDA requires temperature monitoring equipment to be calibrated regularly to ensure food safety, and pharmaceutical companies have even stricter standards from the USP (United States Pharmacopeia). So, how often do you need to calibrate? That depends on the application: gauges used in critical, high-stakes environments (like vaccine storage) need calibration every 30 to 90 days, while gauges in less demanding areas (like a warehouse side room) might only need it once a year. If you purchase our gauges, we include a calibration schedule tailored to your specific use case in our customer training materials.
Calibrating a gauge at home (or on-site, which is easier than sending it out) is simpler than you might think, as long as you have the right tools. The gold standard for temperature calibration is a traceable reference thermometer—this is a thermometer that’s been certified to be accurate by a national metrology institute, so you know its readings are reliable. For most on-site calibration, you can use two common reference points: the freezing point of water (0°C / 32°F) and the boiling point of water (100°C / 212°F) at sea level. That’s not a random trick—water’s phase changes are consistent, so they make perfect reference points for testing your gauge.
Here’s how to do a simple on-site calibration for an analog gauge: First, make sure the gauge is removed from the process it’s monitoring (or isolated, if it’s connected via a thermowell). For the freezing point test, fill a clean container with crushed ice and a small amount of pure water, stir it, and let it sit for a minute until the temperature stabilizes. Then, insert the gauge’s temperature probe (or the end of the thermowell) into the ice water, making sure it’s fully submerged, and wait 2 to 3 minutes for the reading to stabilize. If the gauge is showing a different reading than your reference thermometer, you can adjust it: for analog gauges, there’s usually a small adjustment screw on the back of the unit (or on the face, depending on the model) that lets you move the pointer to align with the correct temperature. For digital gauges, most models have a calibration setting in the menu that lets you input the reference temperature to adjust the reading.
The boiling point test works similarly, but remember that water boils at a lower temperature at higher altitudes—so you’ll need to look up the boiling point of water at your location to get an accurate reference. For more precise calibration, we always recommend using a calibrated dry-block calibrator, which is a device that heats or cools a stable substance (like oil or metal) to a exact, known temperature, making it easier to test gauges across their entire range. We often provide these calibrators to our industrial customers for their in-house maintenance, as they’re a worthwhile investment compared to sending gauges out for professional calibration every time.
Another key maintenance step that many people skip is checking the connection between the gauge and the process it’s monitoring. Whether your gauge is connected via a capillary tube (common for analog remote gauges) or a wired connection (for digital gauges), loose or damaged connections are a top cause of inaccurate readings or complete failure. For gauges with capillary tubes—used to monitor temperatures in hard-to-reach areas, like a pipe running along a ceiling—check that the tube is not kinked, crushed, or stretched. A kinked capillary tube restricts the flow of the liquid inside, leading to delayed or incorrect readings. Also, make sure the tube is secured properly to the wall or pipe so it doesn’t get damaged by foot traffic or equipment movement.
For wired digital gauges, check that the wiring is intact and properly secured, especially if the gauge is in a high-vibration environment, like near a factory conveyor belt. Vibration can loosen wire connections over time, leading to intermittent reading errors. If you notice the gauge’s reading fluctuating randomly, that’s often a sign of a loose or damaged wire. We always recommend using shielded wiring for digital gauges in industrial areas, as it reduces interference from other electrical equipment, which can also cause reading errors.
One common mistake we see customers make is ignoring the gauge’s operating environment. Even the best gauge will fail prematurely if it’s placed in conditions outside its rated specifications. For example, if a gauge is rated for -40°C to 80°F (-40°C to 176°F) and you mount it near a furnace that regularly reaches 120°C (248°F), it’s going to stop working long before its expected lifespan. So part of maintenance is not just caring for the gauge, but making sure it’s in the right place. When you install a gauge from our company, our sales team will help you select a model rated for your specific environment, and we’ll send you a guide to operating limits so you can avoid this issue. For example, gauges in outdoor areas exposed to direct sunlight should have UV-resistant housings, and gauges in high-humidity areas (like meat processing plants) should have sealed, NEMA 4 or IP65 ratings to keep moisture out.
Don’t forget about regular replacement of parts that wear out over time. For analog gauges, the most common wear part is the seal around the housing, which can degrade after a few years, especially in harsh environments. If you notice moisture getting inside the gauge or fogging up the lens, replacing the seal is a simple fix that can extend the gauge’s life for years. For digital gauges, the display is the most wear-prone part, so keeping it clean and protecting it from physical damage (like being bumped by tools) will help it last longer. We sell replacement parts for all the gauges we supply, so you don’t have to replace the entire unit if a small part fails.
Now, let’s talk about what to do if you notice an issue between your regular maintenance checks. If your gauge is giving readings that seem off, don’t just ignore it—don’t assume the process temperature changed. First, do a quick check with your reference thermometer to confirm if the gauge is actually inaccurate. If it is, first check if the connection is loose or the seal is damaged, then calibrate it following the steps we covered earlier. If after calibration it’s still reading incorrectly, it’s likely an internal issue, like a broken bimetal strip in an analog gauge or a faulty circuit board in a digital one. In that case, most of the time it’s more cost-effective to repair the gauge rather than replace it, which is why we offer repair services for all the gauges we supply. We also recommend keeping a log of your maintenance checks and calibrations—this not only helps you track the gauge’s performance over time, but it’s also required for regulatory compliance in most industrial, food, and healthcare settings. A simple notebook or a spreadsheet with the date of each check, the readings compared to the reference, and any adjustments made will save you a lot of stress during audits.
I’ve worked with hundreds of customers over the years, and the ones who get the most life and accuracy out of their temperature gauges are the ones who treat maintenance like a routine task, not a chore. It’s not about spending hours every week—most of these steps take 15 to 20 minutes a month, which is a tiny investment compared to the cost of replacing spoiled product or fixing equipment that failed because of a bad temperature reading.
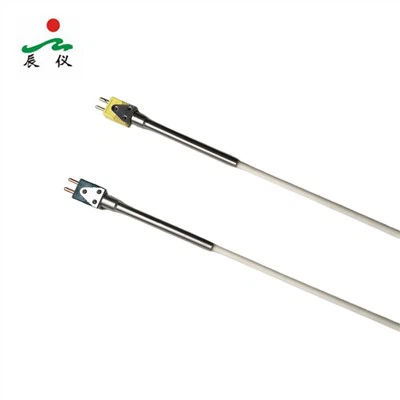
If you’re in the market for new temperature gauges or need support with maintaining the ones you currently use, we’re here to help. Our team has years of experience working with businesses in every industry, from small cafes needing fridge gauges to large manufacturing plants needing high-pressure industrial gauges. We provide custom gauge solutions, on-site calibration support, and replacement parts to make sure your temperature monitoring is always accurate and reliable. Contact our team to discuss your specific needs and find the right temperature gauge and maintenance plan for your operations.
High Temperature Thermocouple References:
- National Institute of Standards and Technology. (2022). Calibration of Temperature Measuring Instruments. NIST Handbook 44.
- U.S. Food and Drug Administration. (2021). Food Safety Monitoring and Control: Temperature Requirements. FDA Food Code.
- International Organization for Standardization. (2019). Industrial Process Measurement and Control Systems – Temperature Gauges. ISO 651:2019.
- American Society for Heating, Refrigerating and Air-Conditioning Engineers. (2020). Maintenance of Temperature Monitoring Equipment for HVAC Systems. ASHRAE Guideline 12-2020.
Chongqing Haichen Instrument Co., Ltd.
Chongqing Haichen Instrument Co., Ltd. is one of the most professional temperature gauge manufacturers and suppliers in China for over 20 years, featured by good service and competitive price. Please rest assured to buy high quality temperature gauge for sale here from our factory. For customized service, contact us now.
Address: No.11 Gusheng Road, Caojie Street, Hechuan District, Chongqing City, P.R. China
E-mail: sales@hcsensor.com
WebSite: https://www.hcsensor.com/
